
Assumes that you have:
Downloaded and Installed the WinLink Express program.
https://downloads.winlink.org/User Programs/
The file is called Winlink Express Install xxxx.zip,
where ‘xxxx’ is the current version number.
Please note: The installed program’s icon and program listing are labeled as “RMS Express”.
Within this document the terms WinLink and RMS Express are interchangeable.
Several modes of operation within RMS Express of particular interest to Amateurs are:
Telnet * Using the program with direct internet connection.
Packet * Using the program with radio via UHF or VHF.
WinMor * Using the program with radio via HF frequencies.
P2P * Peer to Peer
To use these modes for our typical Amateur use will usually require program settings to be changed and we hope the screen shots below will assist in your setups.
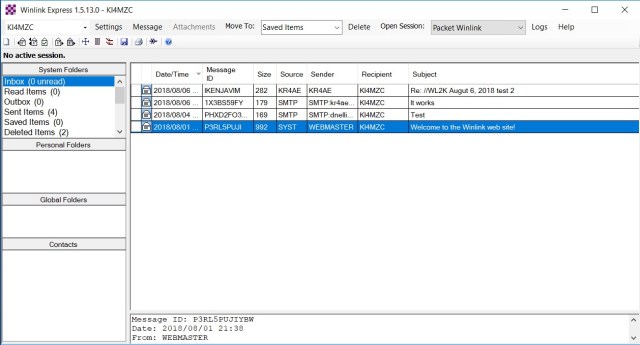
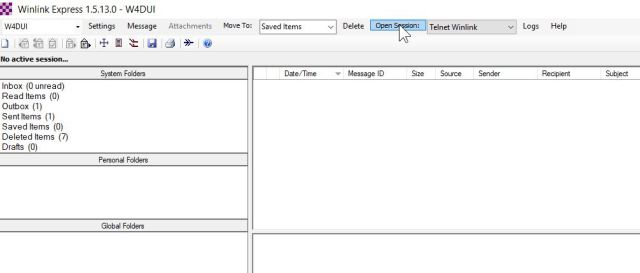
Clicking on the RMS Express icon the program opens the display looks similar to this.
Next, configure your personal information in WinLink Express .
From the menu bar select SETTINGS and WinLink Express Setup.
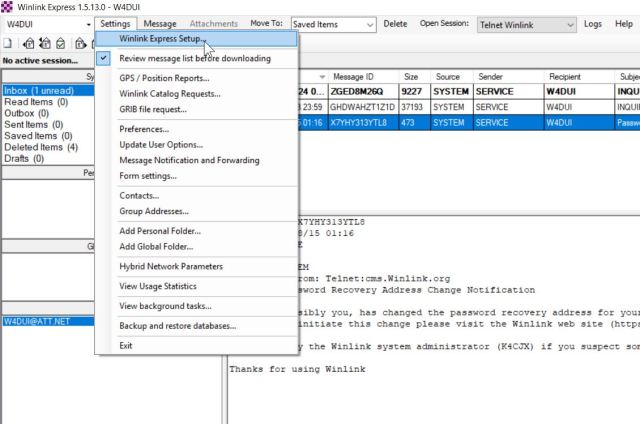
Below is an example provided for us by KI4MZC
Fill in your Callsign and all your contact information using YOUR information.
Note: You may create your own password here and remember to save it for later use.
When all your information in place, click the UPDATE button.
After clicking UPDATE it takes a few minutes for your information to be validated and updated by the remote WinLink Servers. This should not prevent you from continuing with this tutorial and setup, but it could affect sending messages if the server has not finished.

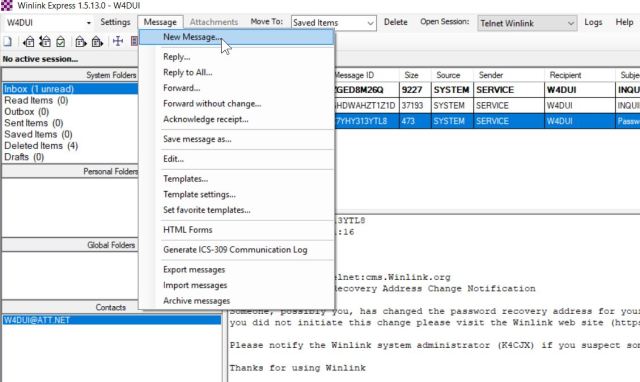
At this point you have complete all the steps required to communicate messages using Telnet on the internet. Try sending your self an email via telnet.
From the menu bar select MESSAGES and NEW MESSAGE.
A familiar email form will appear. Fill out the email form using you own email address.
Enter some brief text for the SUBJECT and in the body out the email.
Now click on the Post to Outbox. Your message has NOT been sent. It is only stored in your outbox. 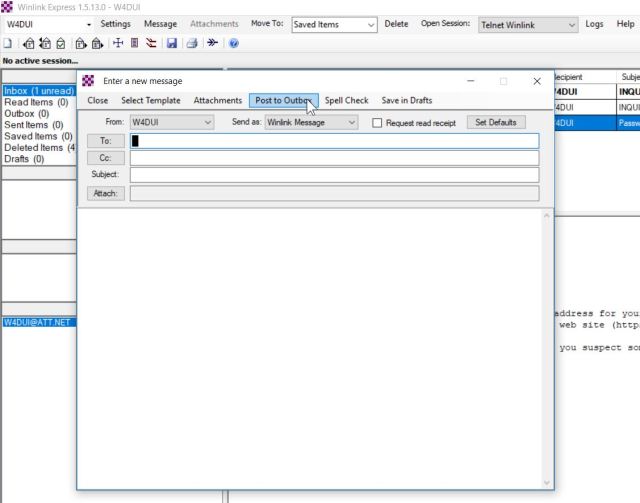
On the menu bar and to the right of Open Session : find the current communication mode. Ensure it has Telnet WinLink displayed, if not click on the mode and change it.
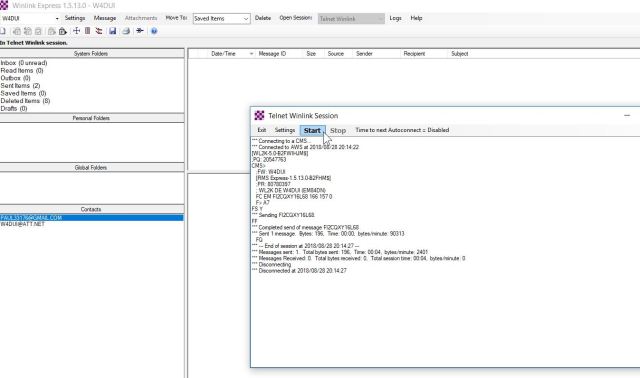
Look at the System Folders on the left panel below. In the Outbox folder it indicates (1) item waiting to be sent. Now click on Open Session.
The Telnet WinLink Session window appears. Now click START and you should see a transmission dialog appear in the window as the progam sents the message.
Since these messages are relayed via the same WinLink Servers that provide the interconnection to many different modes it may not be received as fast as direct email. Using your normal email program, you should see the email you sent as email from your callsign @winlink.org. This is the email address for you to use to receive mail by your Winlink program.
At the end of your setup for telnet and becoming proficient at sending emails you also might try sending yourself the common form IC-213 that is used by ARES. The form will be found on via the menu bar under MESSAGES … TEMPLATES … STANDARD TEMPLATES… and ICS-USA- Forms.
